Relax the patient

Place the edge of the thigh support just proximal to the flexion crease behind the patient’s knee.  Make sure the patient is completely relaxed before strapping the knee arthrometer onto the patient.

Position the KA

The examiner will place one hand on the patient’s femur while placing the thumb and forefinger on the patellar pad.  While holding the patellar pad and femur with one hand, the examiner will use the other hand to bring the proximal velcro strap under the patient’s leg, pull it straight up and secure it onto the top of the knee arthrometer at the proximal end near the load handle. The examiner will then take the distal strap, bring it under the patient’s leg and secure it on top of the knee arthrometer at the distal end.

Use the Strap to Secure the KA to the Patient

Strap the KA onto the patient’s knee by wrapping the straps around the leg and straight upward.  Then fasten with the velcro.

Locate The Joint Line

Palpate the knee and locate the joint line and mark it’s location on the skin.   Position the Blue Bay Knee Arthrometer in the Proximal-Distal direction such that the distal edge of the Patella Reference Pad is directly above the joint line. 

Locate The Joint Line

Palpate the knee and locate the joint line and mark it’s location on the skin.   Position the Blue Bay Knee Arthrometer in the Proximal-Distal direction such that the distal edge of the Patella Reference Pad is directly above the joint line. 

Turn the KA on

The load handle should not be held while turning the knee arthrometer on. The knee arthrometer zeros itself when it is turned on. The time will display for 1 second.  If needed, the time can be adjusted by touching the screen once. “Set Time” will appear on the menu along with Set Graph Color and Set Compliance Denominator. HH and MM will display above a + and – sign to allow adjustment of the time forwards and backwards. YYYY MM and DD will display above + and – to adjust the year, month and day forward or backwards.

Menu

The touch screen displays (from the top):
  • load (in lb) and displacement (in mm)
  • zero displacement at the current position
  • records and displays load displacement and saves the data      onto a SD card
  • Records maximum displacement during the manual/maximum test
  • Plots SD card data

Menu

The touch screen displays (from the top):

  • load (in lb) and displacement (in mm) 
  • zero displacement at the current position
  • records and displays load displacement and saves the data onto a SD card
  • Records maximum displacement during the manual/maximum test
  • Plots SD card data

Test the Knee

Zero the displacement measurement by touching “Zero Displacement” on the screen.  The examiner will tap “Record Data”.   The load handle will be pulled up slowly until three (3) beeps sound (15, 20 and 30 lbs anterior). Then the examiner will push the load handle down until the 4th beep sounds (15 lbs posterior).

Load/displacement Curve

The screen is then tapped again to obtain the load-vs-displacement curve.

Load/displacement Curve

The screen is then tapped again to obtain the load-vs-displacement curve.

Select a Comparison Curve

If save is chosen, select “Yes” to compare the current curve with a curve previously saved. Optionally, you can touch “No” and return to the main menu.  If “Yes” is chosen, the screen will display dates and times for previous data.  Tap the desired comparison curve file on the display. Files are displayed with a “L” for left, “R” for right or “MR” (Man Max Test Right) along with time and date.  Tap the screen again to return to the main menu.

Save the Data

The examiner will tap the screen to save the data as right knee or left knee or choose not to save file.

Save the Data

The examiner will tap the screen to save the data as right knee or left knee or choose not to save file.

Compare Two Curves

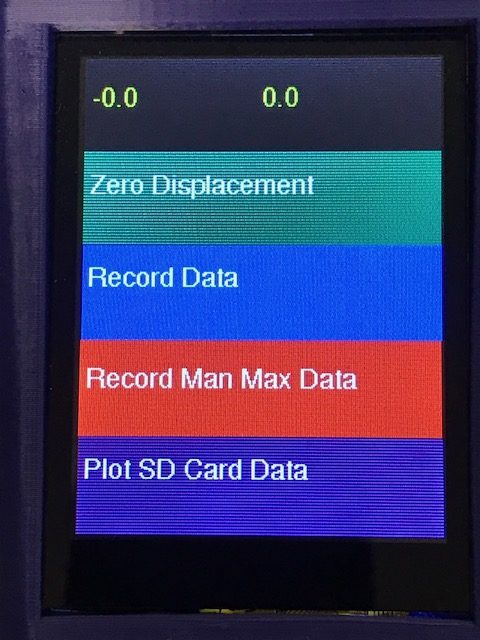
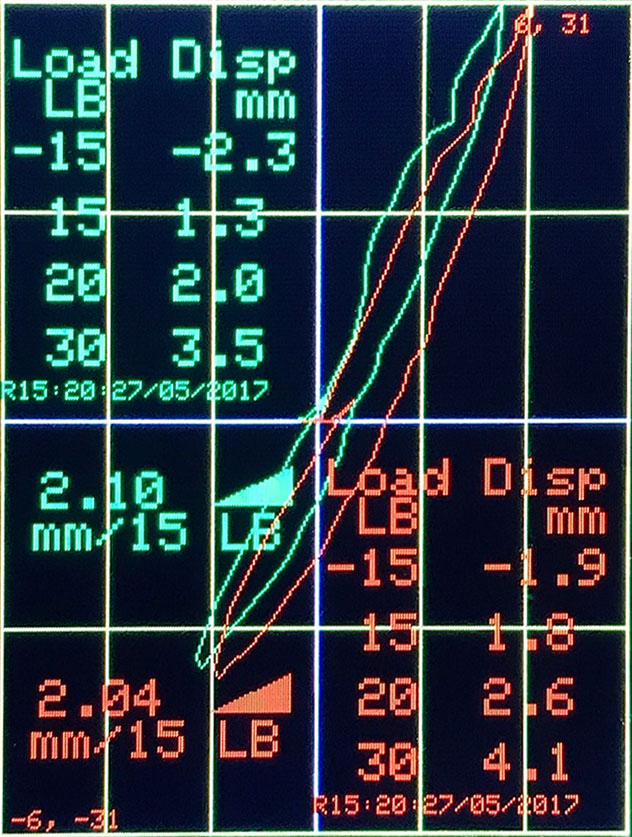
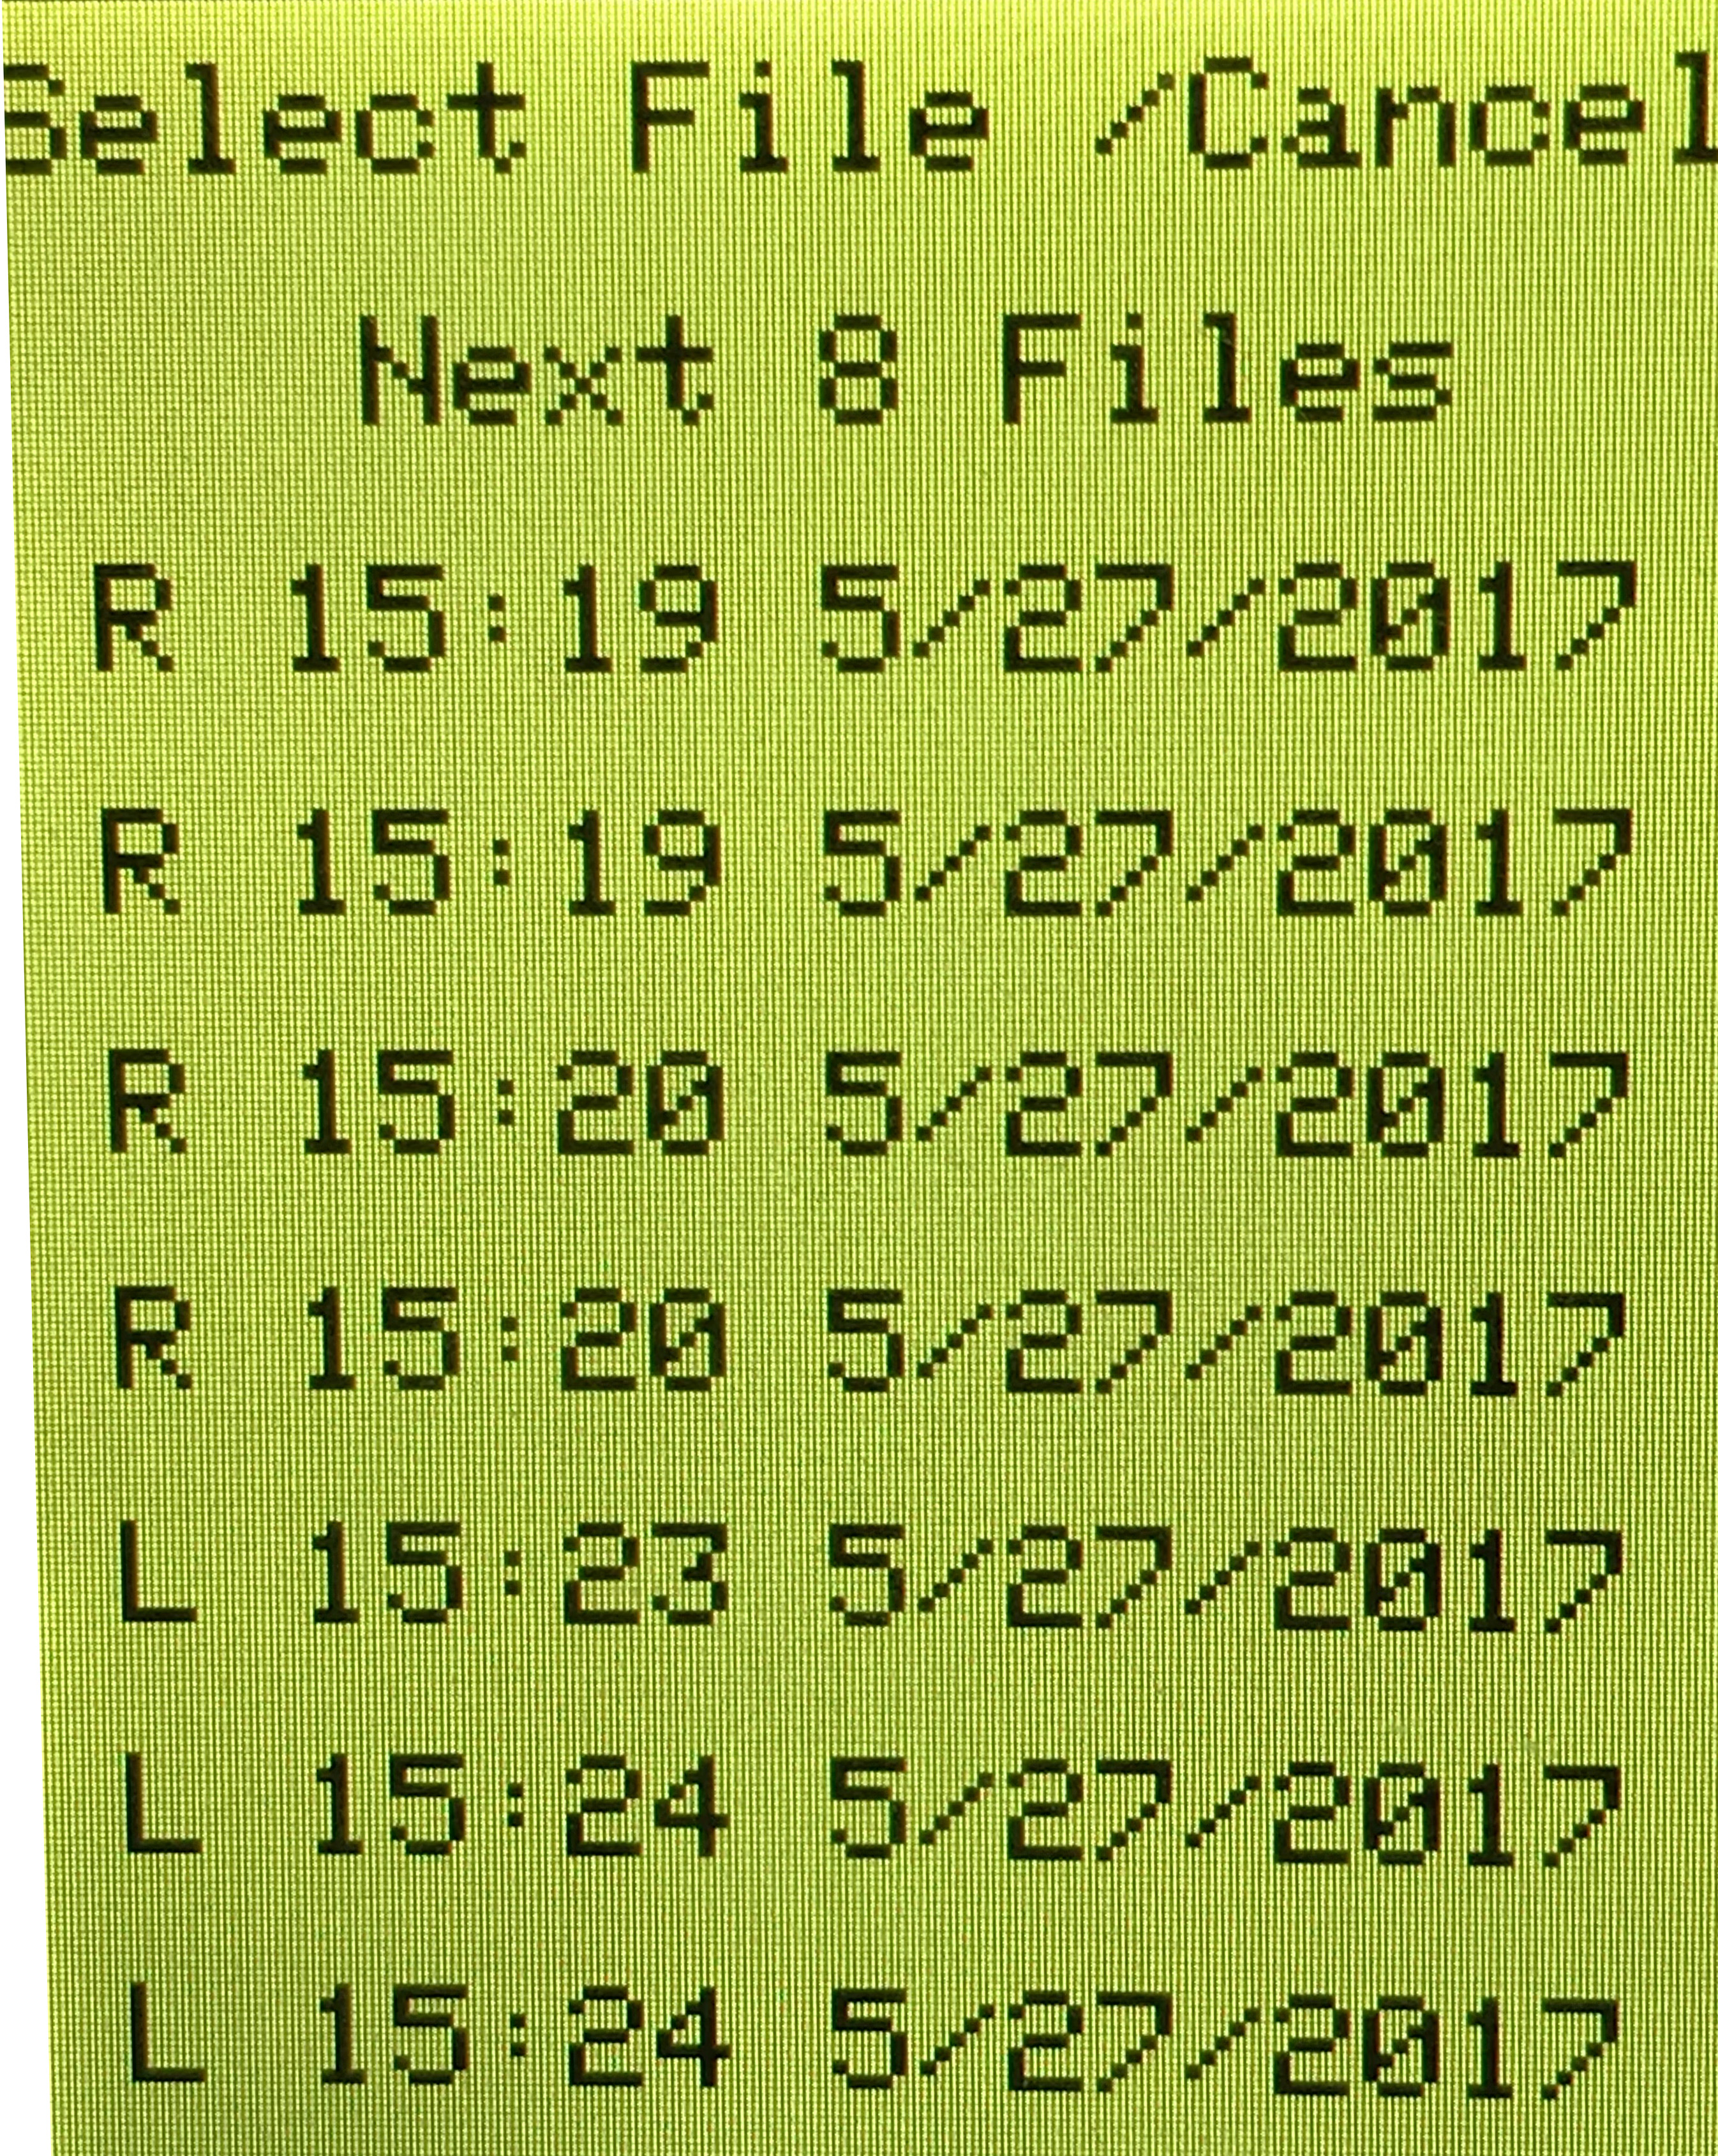
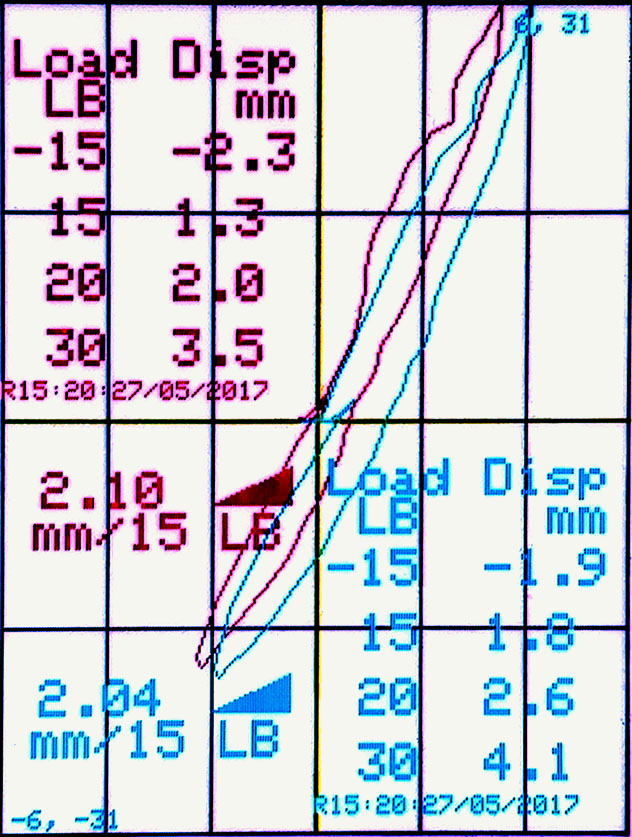
If the examiner wishes to compare two previous curves that have been saved on the SD card, the user will touch Plot SD Card Data on the main menu. For example, the data for the patient’s right and left leg can be compared. The examiner will select one or two curves, by touching the desired file, one file at a time.   If only one curve is desired, select the same curve twice.  The touch screen displayed represents two tests on the same (right) leg.

Screening Tests

If desired, perform the Lachman Test, a PCL Screen and a Quad Active Test on the patient.