Relax the patient

Lay the patient supine (face upward) on an exam table so that the patient’s ankle joint is 2-3 inches off the edge of the table.

Place the calf support under the patient’s calf. The distal end of the calf support should be near the end of the table.

Make sure the patient is completely relaxed before strapping the distal tibia to the table.

Strap the Tibia

The examiner will strap the patient’s distal tibia to the table (crossbar) with the Velcro straps provided. The straps should pass downwards from the tibia (top of angle) and secured to the table structure under the limb. The straps should be tightened sufficiently to minimize tibial lifting during anterior foot loading. If the table allows, strapping the knee area can prevent knee flexion during posterior foot loading.

Secure the AA to the Patient

The foot plate is secured to the foot through medial and lateral heel pads that are tightened together and a dorsal foot pad that is tightened against the foot forcing it onto the foot plate and against the posterior heel pad.

Testing Can Begin

Once the AA is secure on the limb and the patient is comfortable, testing should begin. The foot plate will be positioned at the desired flexion (often 0.0 degrees flexion) and held there throughout testing.

A-P Testing

Touch “AP TEST” on the Touch Screen.

Watch the Flexion Angle on the Touch Screen and set the Foot Plate to the desired angle on the screen. Maintain this flexion throughout the test.

Lift up on the load handle until the A-P Force Reads Zero.

Touch Zero & Start Test on the Touch Screen.

Apply a 100-125 N load to the patient’s foot posteriorly and then apply a 100-125 N load anteriorly. The load should be applied smoothly. The patient should be asked to report if the posterior heel loses contact with or slips on the posterior heel pad.

A-P Test Continued

After the loading cycle is complete, touch “Stop recording” on the touch screen.

If the examiner is happy with the A-P test, “Save” will be touched on the screen. Then “Save as left” (leg) or “Save as right” (leg) will be touched. Load and displacement data and a curve will be saved to the SD Card and can be retrieved at any time.

If the examiner is not happy with the test, “Don’t Save” will be touched.

The foot must be loaded in a pure anterior-posterior direction.

I-E Testing

The Inversion-Eversion test is performed similarly to the A-P test.

It is important for the examiner to relax the patient and remind the patient not to guard against rotation.

The patient should be asked to report to the examiner if there is slippage at the pads or if comfort is not sufficient to complete the test or eliminate guarding.

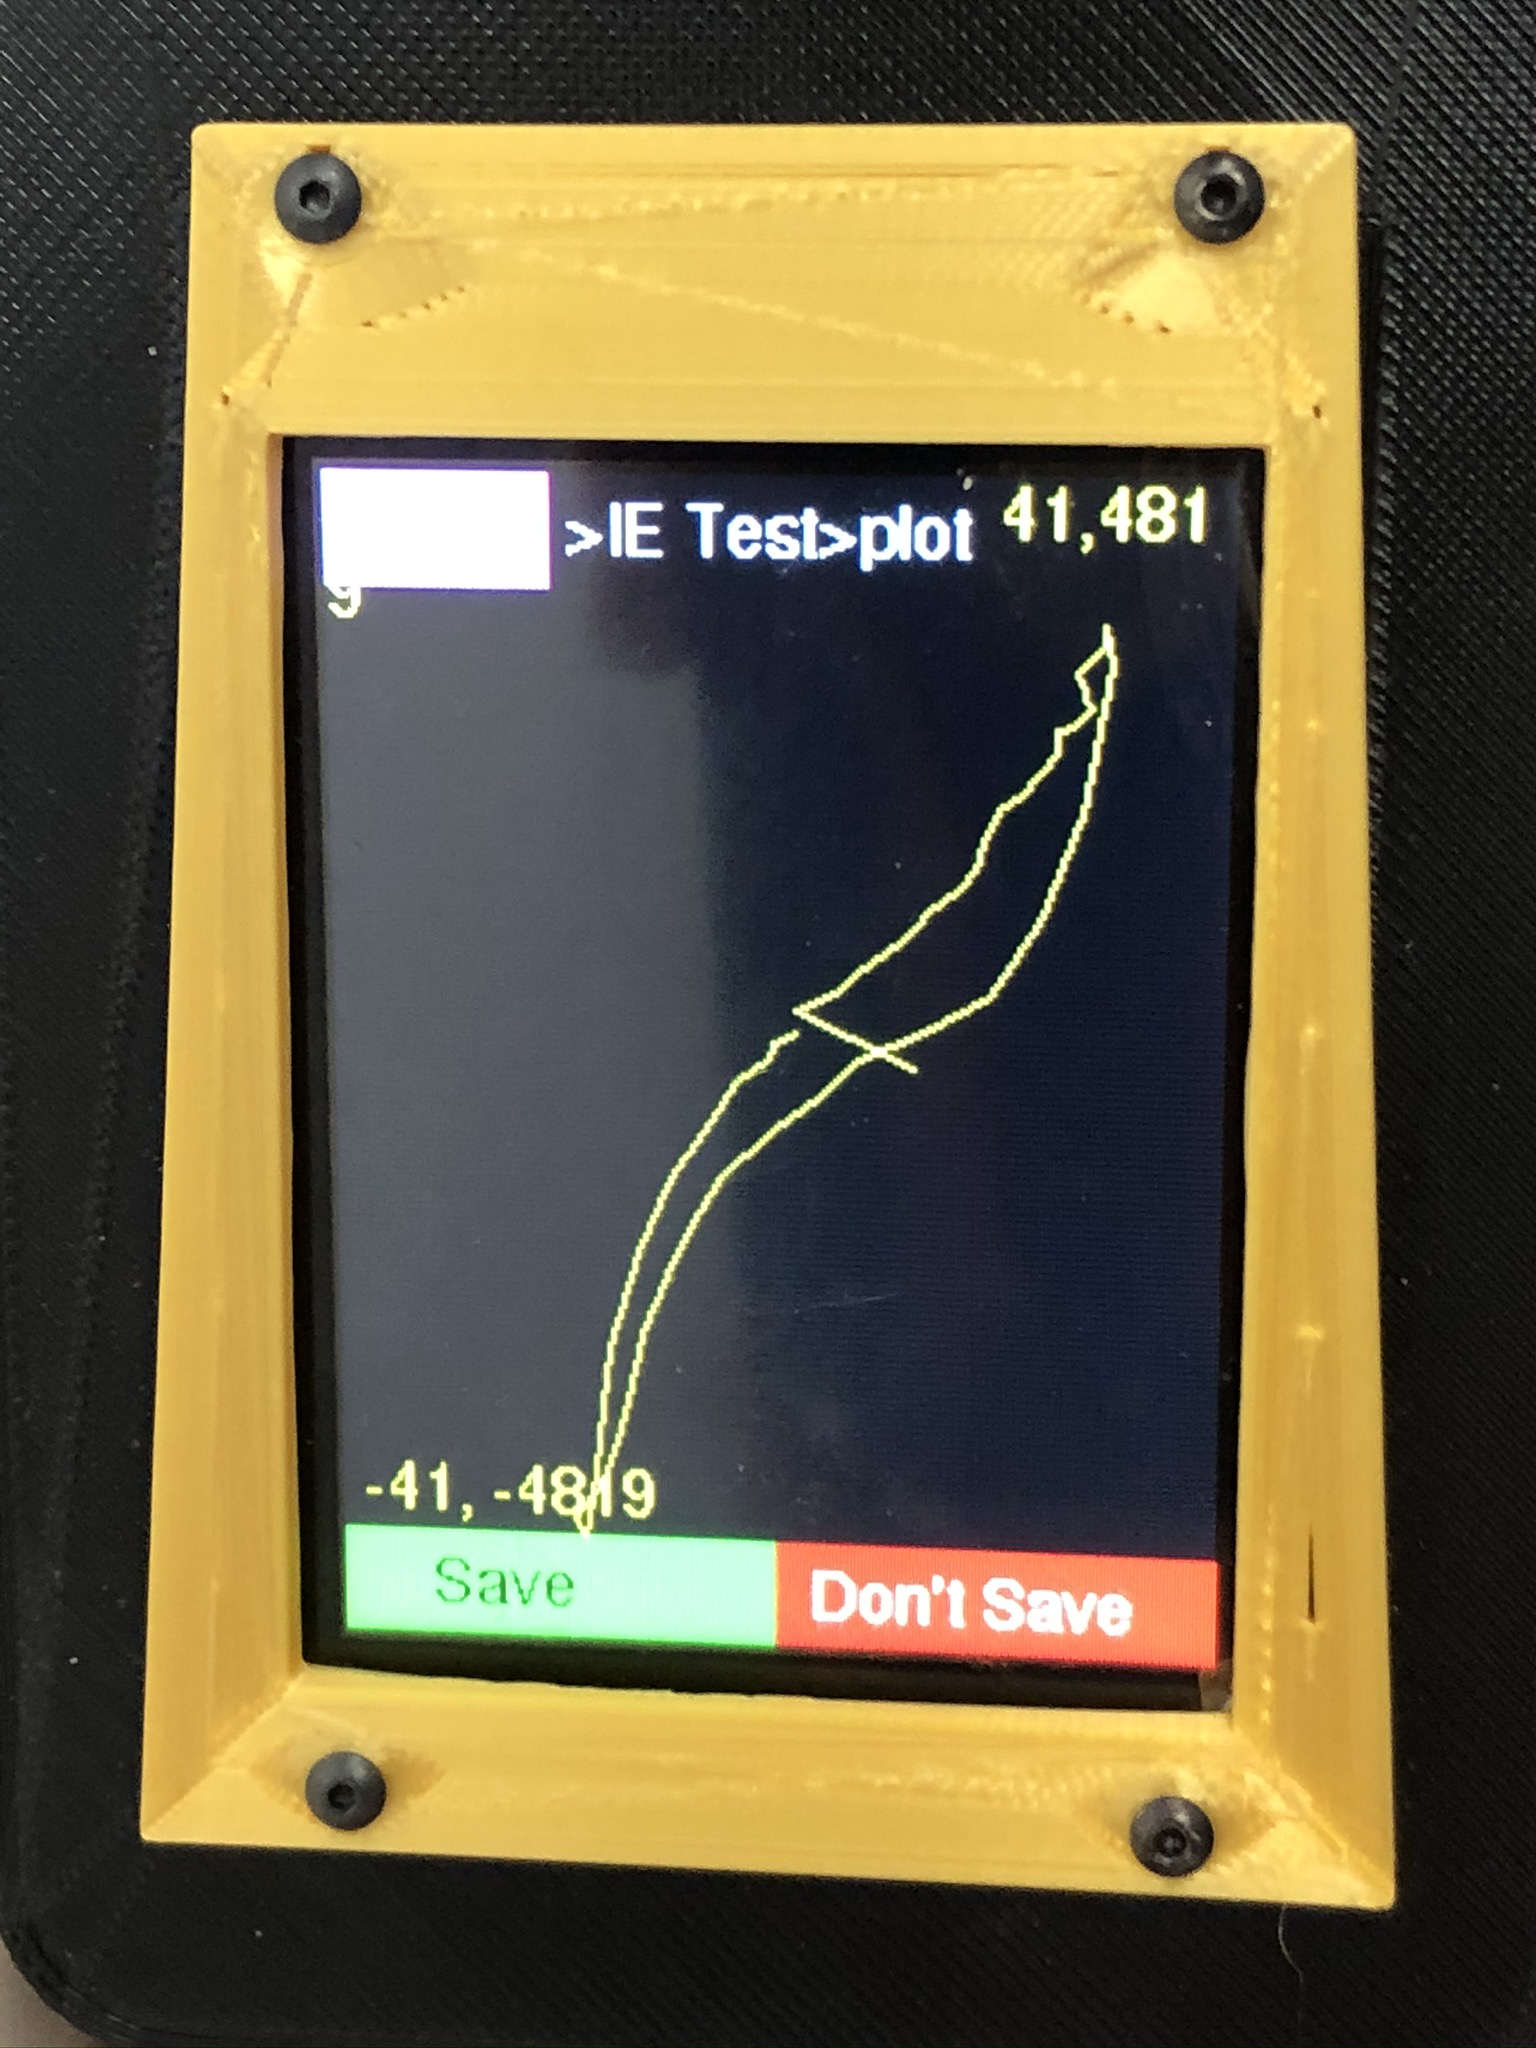
In general, the examiner should monitor the indication of A-P force, I-E moment, and flexion angle simultaneously during the entire test.

Moderate loading speed and practice will increase the chances of reproducible testing.

I-E Test Continued

Touch ‘IE TEST” on the Touch Screen.

Watch the Flexion Angle on the Touch Screen and set the Foot Plate to the desired angle on the screen. Maintain this flexion throughout the test.

Rotate the load handle until the I-E Force Reads Zero.

Touch Zero & Start Test on the Touch Screen.

Apply a 100-125 N load to the patient’s foot inward (inversion) and then apply a 100- 125 N load outward (eversion). The load should be applied smoothly.

After the loading cycle is complete, touch “Stop recording” on the touch screen.

If the examiner is happy with the I-E test, “Save” will be touched on the screen. Then “Save as left” (leg) or “Save as right” (leg) will be touched. Load and displacement data and a curve will be saved to the SD Card and can be retrieved at any time.

If the examiner is not happy with the test, “Don’t Save” will be touched.

Compare Curves & Data

If the examiner wishes to compare two previous curves that have been saved on the SD card, the user will touch “PLOT EXISTING DATA” on the main menu. For example, the data for the patient’s right and left leg can be compared.

The examiner will select one or two curves, by touching the desired file, one file at a time. If only one curve is desired, select the same curve twice.

The two curves will then display on the screen for comparison purposes.”

Viewing Saved Curves

Choose 2 curves to compare. For example Choose IE Test Left and IE Test Right to compare curves and data for the left and right ankle.